
Here are the key points, strengths, and limits to know first, so you can quickly decide whether this is the right fit for you.
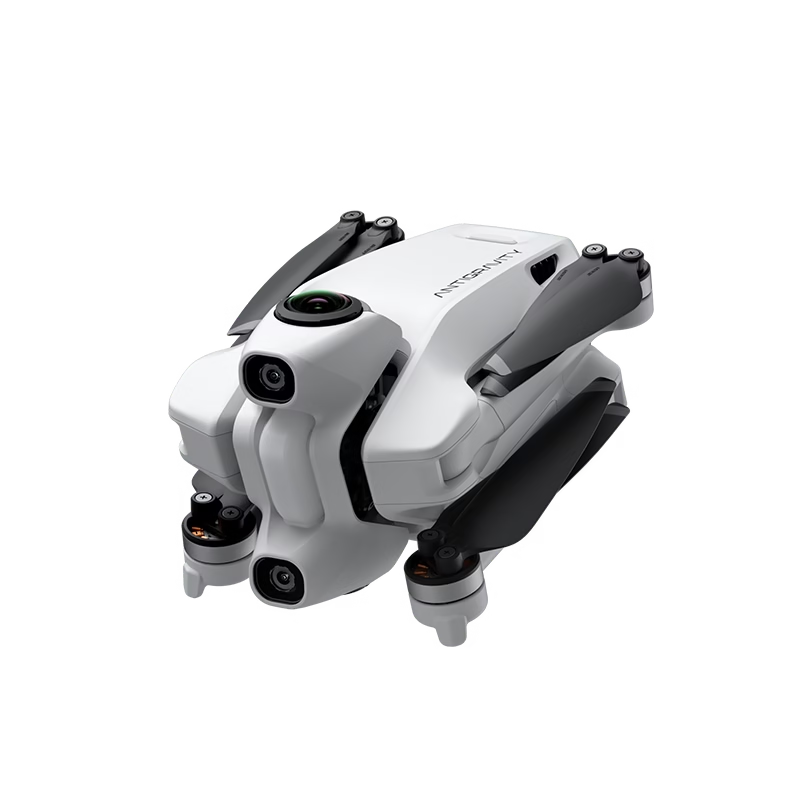
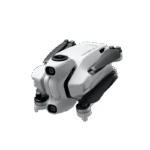
When you use an immersive drone like the Antigravity A1 , indicator lights become your best ally.
No need for a complicated interface: at a glance, you know exactly what’s going on.
👉 And that’s precisely what makes this drone so powerful: a simple, intuitive… but ultra-powerful experience.
In this guide, you will understand 100% of the warning lights to fly with peace of mind.
✈️ Why indicator lights are essential on the Antigravity A1
Unlike conventional drones, the Antigravity A1 focuses on an immersive experience.
👉 Result:
The indicators become an instant visual language .
They allow you to:
- Check that everything is OK before taking off
- anticipate problems
- react quickly in flight
- avoid crashes
It’s simple: once you understand them, you fly much more calmly.
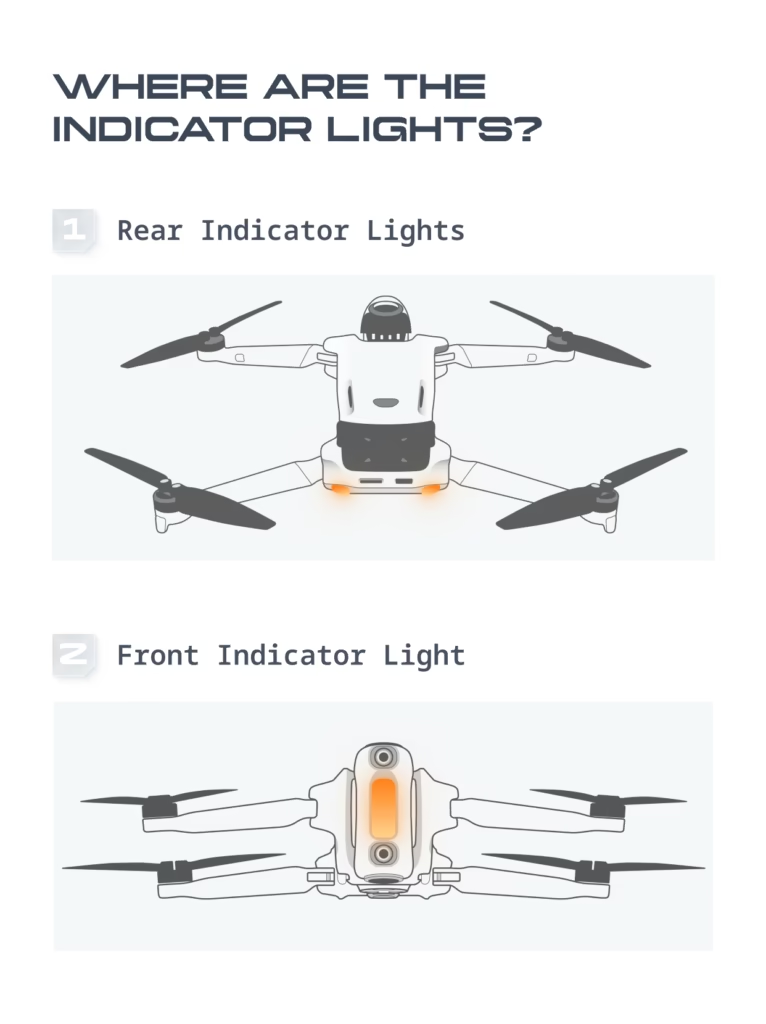
🎯 The different indicator lights of the Antigravity A1
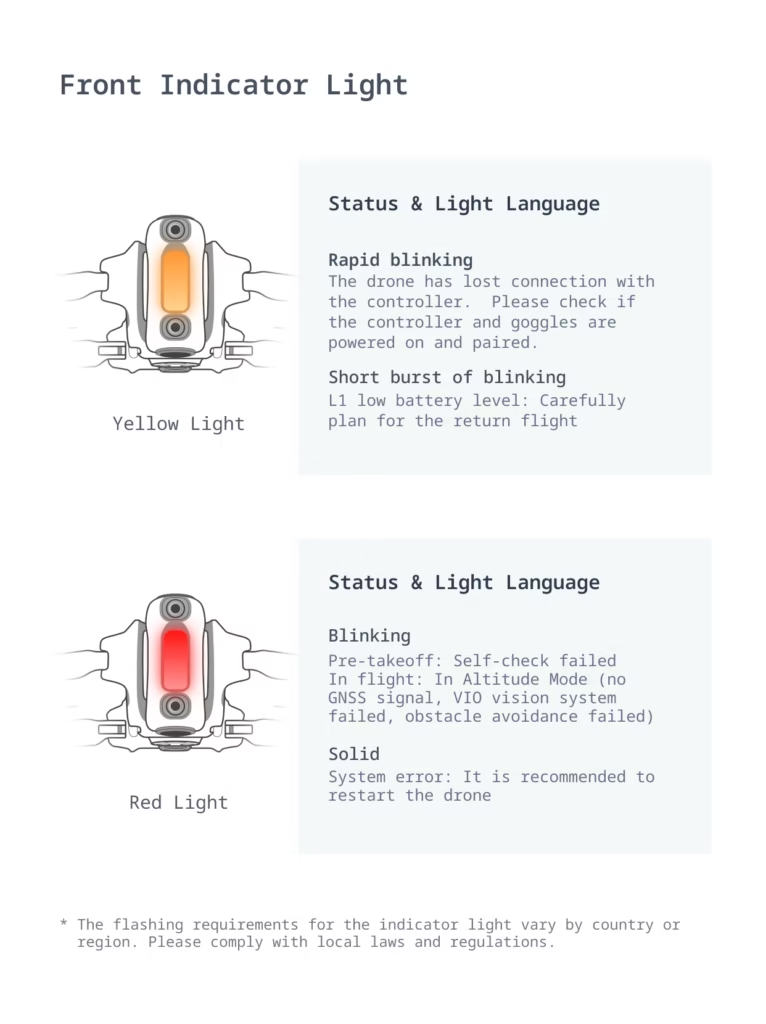
🔹 Front Indicator
👉 This is the main indicator light
It gives you the overall status of the drone
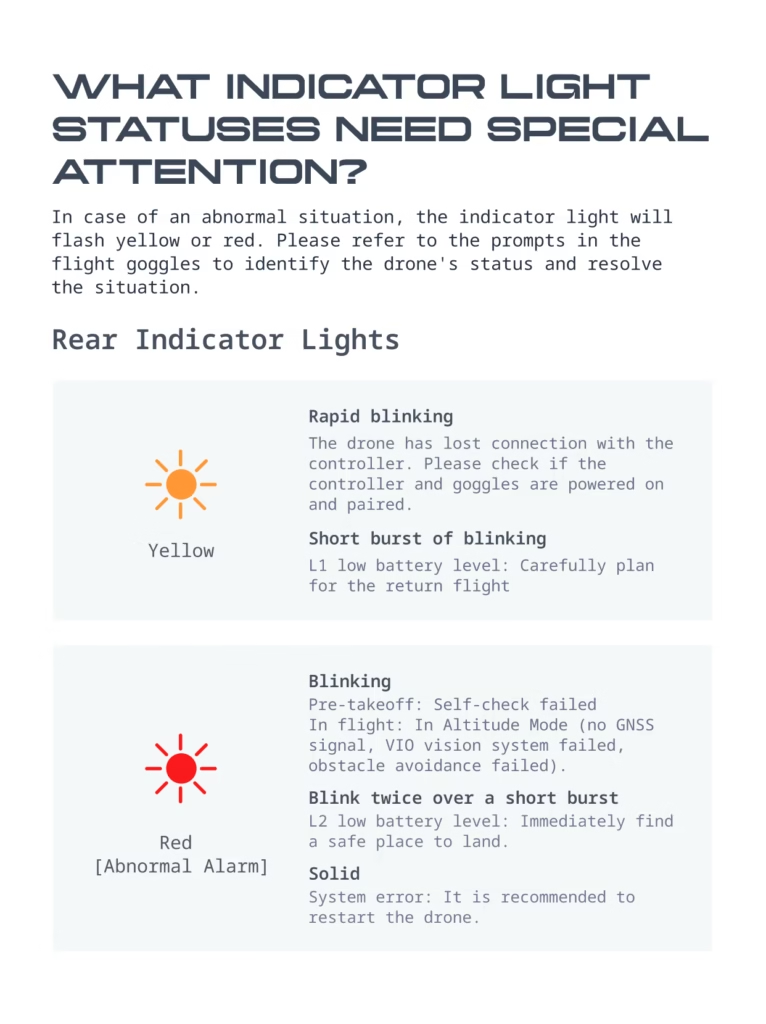
🔹 Rear lights
👉 More technical
They state:
- the status of the system
- the flight phases
- alerts
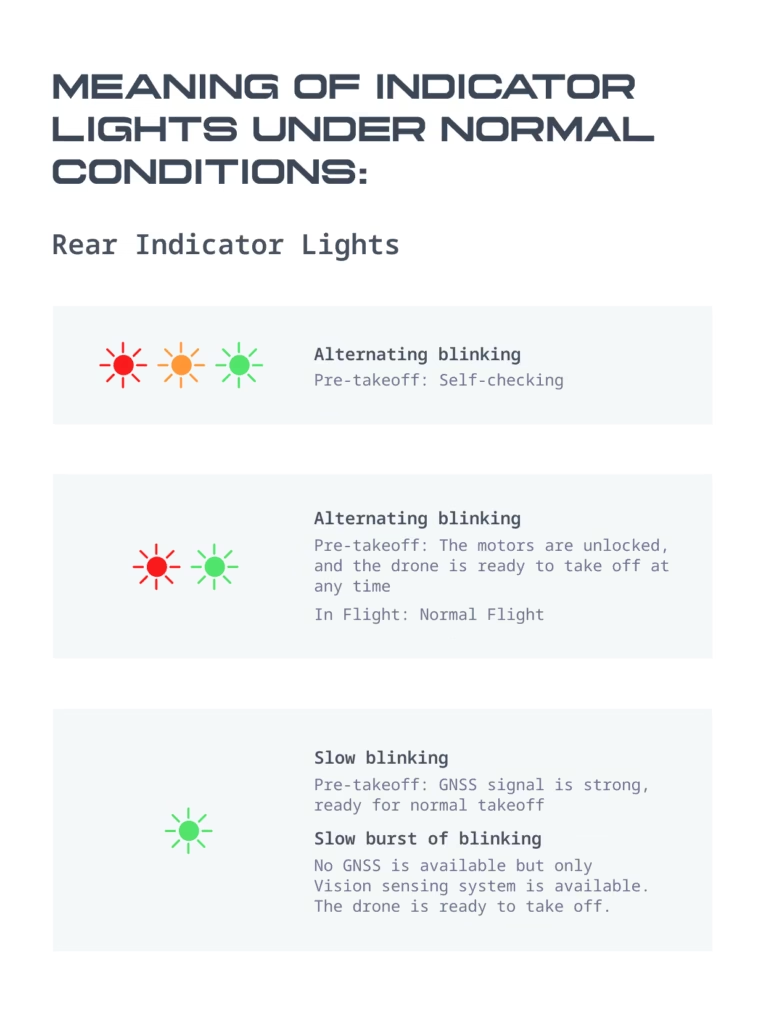
🟢 Meaning of colors (absolutely essential to remember)
🟢 Green → everything is fine
- Slow flashing = normal flight
- Drone ready for takeoff
👉 This is the “quiet” mode
🔵 Blue → update in progress
- Firmware is installing
⚠️ Never turn off the drone in this case
🟡 Yellow → caution
Two cases:
- Rapid flashing → loss of connection
- Short flashing → low battery (level 1)
👉 You need to start thinking about the return
🔴 Red → problem
- Flashing → sensor error or loss
- Fixed light → system error
👉 In this case: restart recommended
⚠️ Important alerts to be aware of
📡 Connection loss
👉 Rapidly flashing yellow light
To do:
- check controller
- check glasses
- bring the drone closer
🔋 Low battery
- Level 1 → return recommended
- Level 2 → immediate landing
👉 Don’t play with that
🛰️ Loss of GNSS signal
The drone switches to “Altitude” mode
👉 It becomes less stable
👉 Avoid complicated areas
🚨 System error
👉 Solid red light
Solution :
- restart the drone
- check firmware

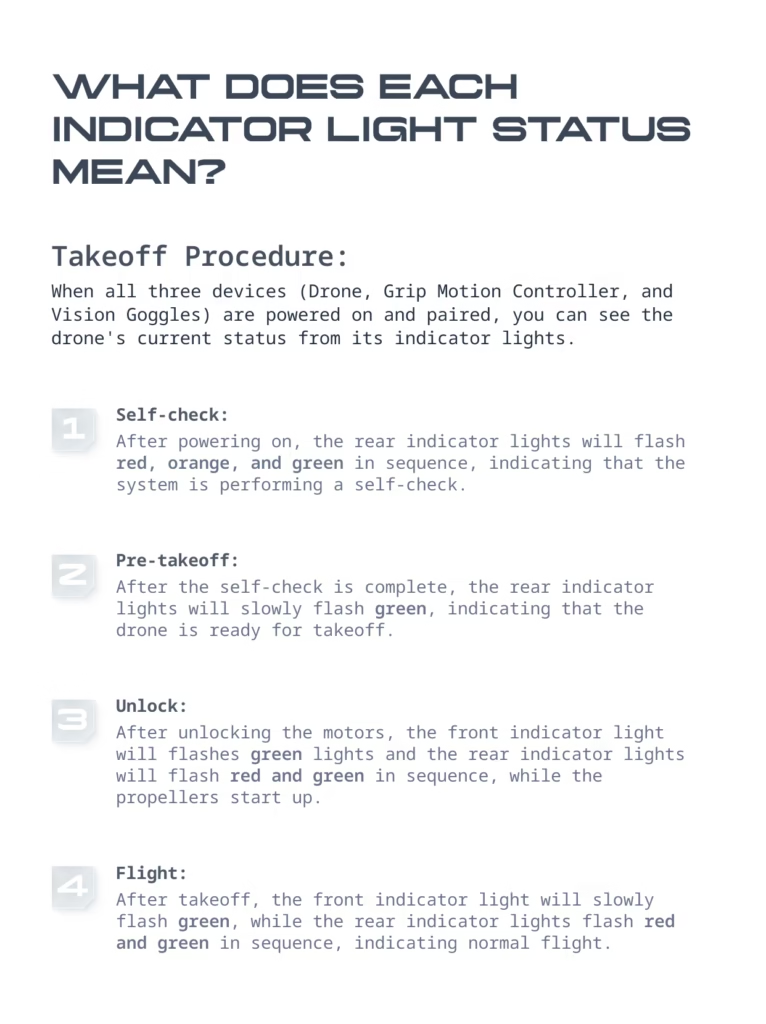
🧭 Sequence of indicator lights (from start-up to flight)
1️⃣ Ignition
The indicator lights alternate (red / yellow / green)
👉 Auto-check in progress
2️⃣ Pre-takeoff
Slow flashing green light
👉 The drone is ready
3️⃣ Takeoff
Engine activation
Change of sequence
4️⃣ In flight
Steady green = everything is OK
🛠️ What to do if a warning light is abnormal?
Quick checklist:
- Check battery
- Check connection
- Restart the drone
- Update firmware
- Check environment
👉 90% of the problems come from there
🧠 Tips to never panic
- Always check the warning lights before takeoff.
- Never ignore a yellow warning light
- Flying in an open area
- Maintain a good line of sight
👉 With this, you eliminate almost all the risks
🎥 Why these indicators are key on an immersive drone
The Antigravity A1 is designed differently:
- no complex interface
- no need to look at a screen
- Everything comes down to experience.
👉 The indicator lights become your “dashboard”
And that changes everything.
❓ FAQ
Why is my drone flashing yellow?
👉 Connection loss or low battery
What does a steady red light mean?
👉 System error → restart required
Is it possible to fly without GPS?
👉 Yes, but reduced stability
How do I know if the drone is ready?
👉 Slow flashing green light
🔥 Conclusion
The indicator lights on the Antigravity A1 may seem technical at first…
But in reality, it’s extremely simple:
- 🟢 Green = OK
- 🟡 Yellow = caution
- 🔴 Red = problem
- 🔵 Blue = update
👉 In 2 flights, you’ll have mastered everything.
🚀 Discover the Antigravity A1
If you want to experience something completely different from a classic drone…
👉 Check this out:
👉 Discover the Antigravity A1
💡 With the code AGRRLOV , you can get:
- a lens replacement kit
- a free take-off mat
👉 Honestly, it’s a no-brainer if you want to get into 360 immersive drones.


Leave a Reply