Creating beautiful videos with a drone can quickly become intimidating. You have to think about the trajectory, the camera orientation, the framing, the speed, the light, the subject to keep in the frame… and all this while the drone is in the air.
With a 360 drone, the logic changes completely.
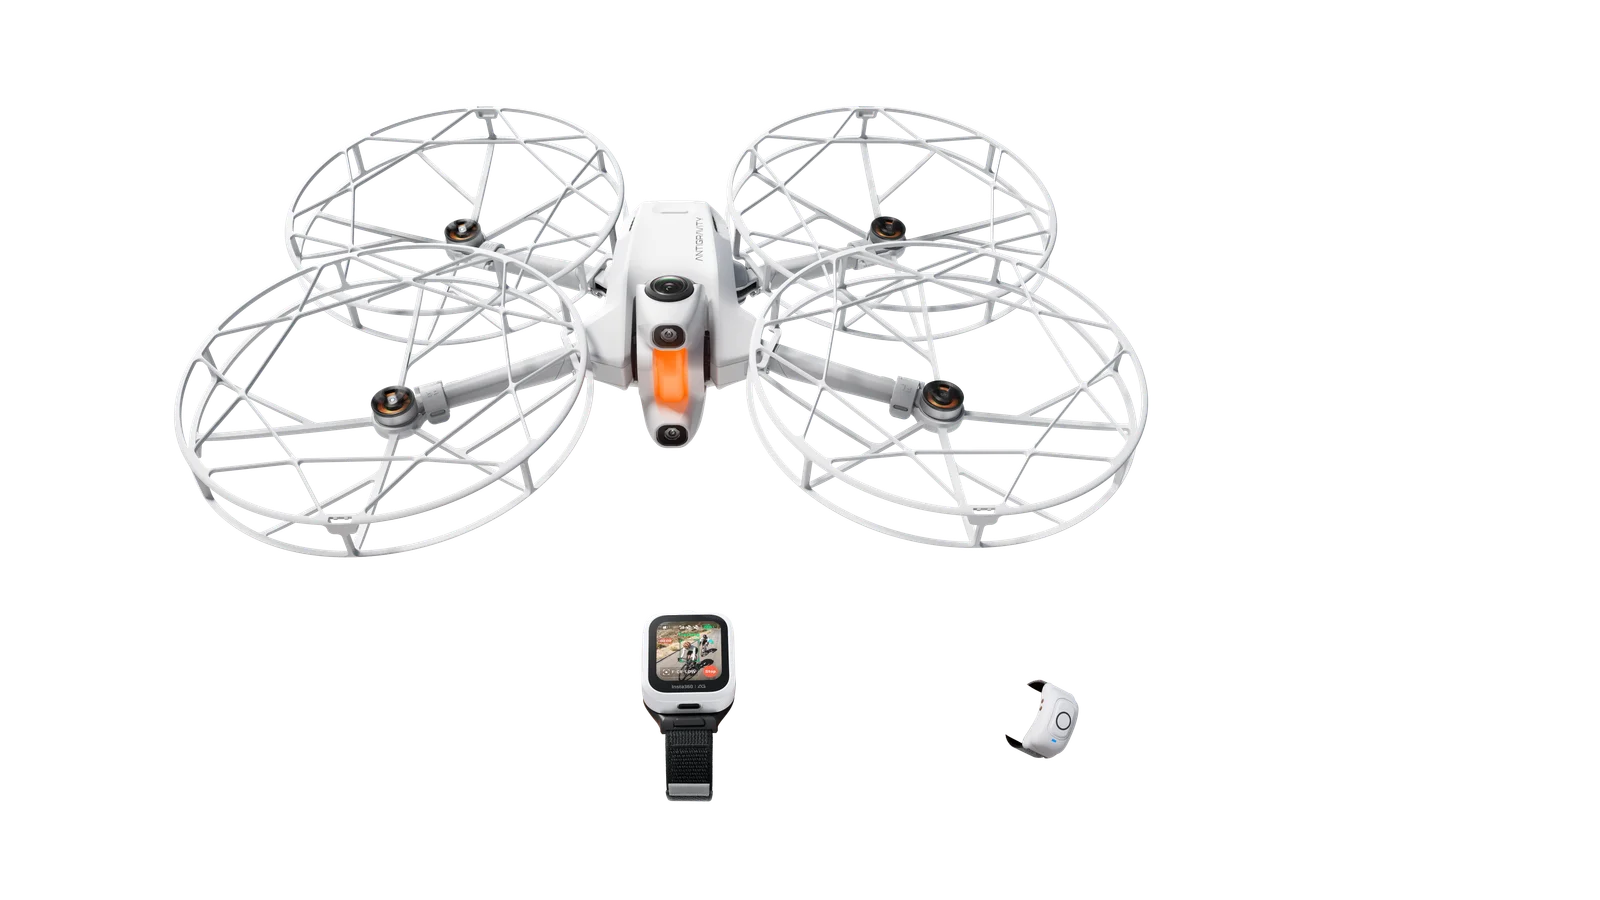
Instead of having to achieve the perfect framing during flight, you can capture the entire scene around the drone and then choose your angle later in post-production. This is precisely what makes the Antigravity A1 so appealing to content creators, travelers, beginner videographers, or anyone who simply wants to bring back more immersive footage without spending hours piloting.
The idea is no longer just to “film with a drone”. The idea is to fly, explore, capture the whole atmosphere of a place, then transform a single flight into several pieces of content: a YouTube video, an Instagram Reel, a Short, a story or even a vlog sequence.
In this article, I share 7 easy video shot ideas you can make with the Antigravity A1 , even if you’re a beginner with a 360 drone.
Why a 360 drone completely changes the way you film
With a conventional drone, you often have to anticipate your framing during the flight. If you miss the angle, if the subject goes out of frame, or if your movement isn’t smooth, you have to start over.
With a 360 drone like the Antigravity A1 , you can film the entire scene around the drone. This means you can choose after the fact whether you want a front, back, side, downward view, or even a dynamic rotation movement.
It’s this “fly first, frame later” principle that makes the 360 drone particularly powerful for content creation. You can do a single flight, then extract several different videos depending on your needs.
For example, you can create:
- a horizontal video in 16:9 for YouTube;
- a vertical video in 9:16 for Reels, TikTok or Shorts;
- a wide landscape shot;
- a plan centered on you;
- a bird’s-eye view;
- a camera movement that is impossible to easily achieve with a conventional drone.
And that’s where the Antigravity A1 becomes truly interesting: it’s not just about the specs. It offers a genuinely immersive flight experience with its Vision goggles, FreeMotion control, 360° 8K video, Deep Track, Sky Path, and AI-assisted editing.
1. The immersive forward tracking shot
The forward tracking shot is one of the simplest shots to achieve, but also one of the most effective.
The idea is very simple: you move the drone slowly towards a landscape, a road, a beach, a waterfall, a cliff, or a viewpoint. The movement should be fluid, gradual, and slow enough to give a cinematic feel.
With a conventional drone, you have to carefully position the camera from the start. With the Antigravity A1, you have more freedom because you capture the entire scene in 360 degrees. If your angle isn’t perfect during the flight, you can correct it later in post-production.
How to carry out this plan
Place the drone in an open area. Choose a scene with depth: a path, a road, a river, a beach, a valley, or a cliff face. Move the drone slowly towards the scene.
During editing, you can reframe towards the front to get a very immersive shot, or slightly to the side to give a more natural impression, as if the camera were floating in space.
Example in Réunion
This plan works very well on:
- a mountain road;
- a hiking trail;
- a beach at sunset;
- a waterfall;
- a ridge with a view of the ocean;
- a viewpoint like Maïdo or Roche Verre Bouteille.
It’s a perfect plan to open a YouTube video or create a very immersive short sequence for Instagram.
2. Vertical ascent with dynamic reframing
Vertical climbing is a classic drone feature, but with a 360 drone, it becomes even more interesting.
The idea is to start from a fairly low point, then gradually raise the drone to reveal the landscape. It’s a very effective technique for creating a “wow” effect, especially if you start with a close-up subject before revealing a much wider scene.
How to carry out this plan
Place the drone near something of interest: yourself, your backpack, a car, a tent, a beach, a house, a trail, or a rock. Gently raise the drone vertically.
In the editing process, start with a close-up of the subject, then gradually widen to a broad view. You can also add digital camera movement to enhance the revelation effect.
Why this plan works well
This type of shot works really well because it tells a story. You start with a detail, then you discover the context. It’s ideal for a vlog intro, a travel video, or a Reel.
With the Antigravity A1, you can capture multiple versions of the same shot: a vertical version for social media, a horizontal version for YouTube, and even a downward crop for a more dramatic view.
3. The “invisible drone” plan
One of the major advantages of a 360 drone is the ability to obtain a rendering where the drone disappears from the image.
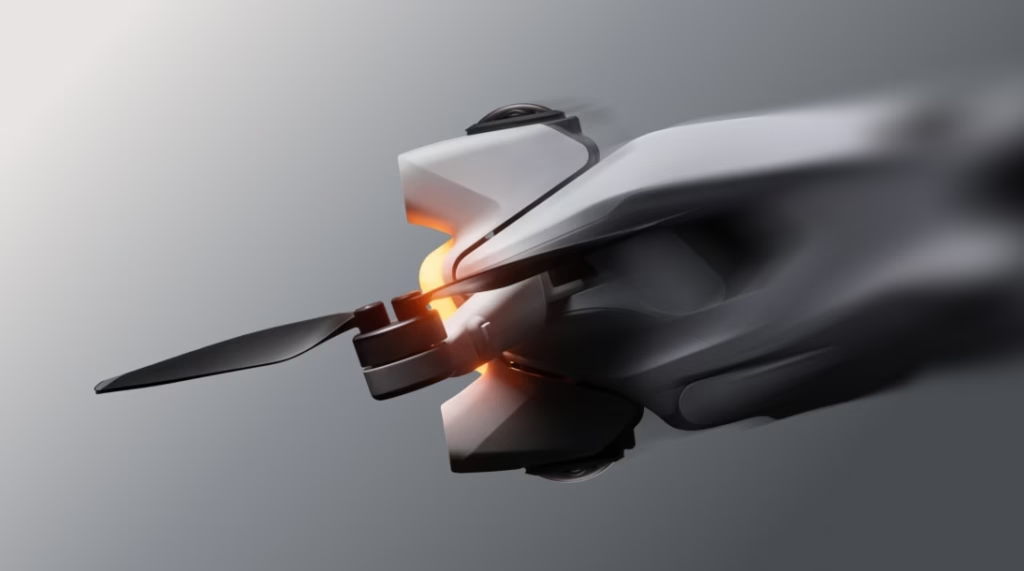
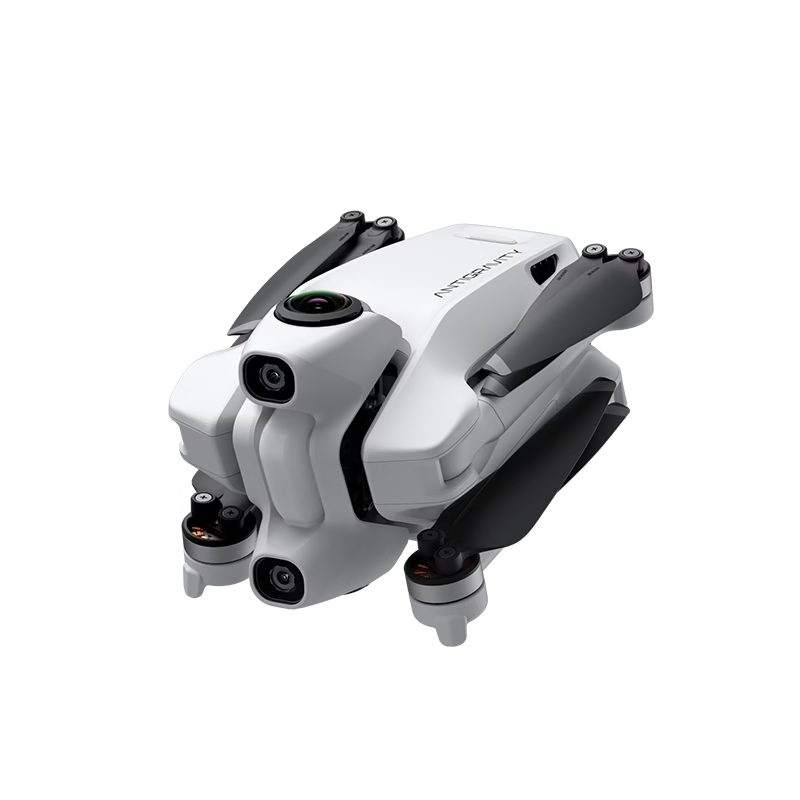
On the Antigravity A1, the lenses are positioned to capture an immersive 360-degree view, with an stitching algorithm that creates an invisible drone effect. The result: you get the sensation of a camera floating in mid-air, without seeing the device itself in the frame.
Why this is interesting
The “invisible drone” shot gives a very different impression from a classic drone. You no longer really feel the machine. You get more the impression of a camera gliding through space.
It’s perfect for creating:
- a video intro;
- a transition between two sequences;
- an immersive shot above a landscape;
- a travel sequence;
- a contemplative moment in a vlog.
Filming advice
To get the best possible results, prioritize good lighting. Film outdoors, preferably in the morning, late afternoon, or on a bright but not too harsh day. 360 footage loves light, especially if you plan to crop it cleanly later.
-1-1024x571.avif)
4. Deep Tracking
Deep Track is one of the most practical shots for content creators, especially if you’re filming yourself.
The idea is to select a subject, then let the drone automatically follow it. This could be you walking, running, cycling, hiking, or simply moving through a landscape.
When to use Deep Track
This plan is ideal for:
- a hike;
- a walk on the beach;
- a travel scene;
- an outdoor video;
- a presentation of the venue;
- a sequence where you want to appear in the background;
- A dynamic reel with a moving subject.
Why it’s powerful with a 360 drone
With a conventional drone, if the subject isn’t perfectly centered, the shot can quickly be ruined. With the Antigravity A1, 360 capture allows you to reposition the framing during editing. Even if the subject isn’t exactly in the center during the flight, you can adjust the composition afterward.
This makes Deep Track very interesting for creators who want to film themselves alone, without having to pilot and frame at the same time.
Example of a simple plan
You’re walking along a path with a beautiful landscape behind you. The drone is following you. During editing, you can create a horizontal version for YouTube, then a vertical version centered on you for Instagram Reels.
This is exactly the kind of plan that immediately gives a more professional look, without necessarily requiring a high level of piloting skill.
5. The 9:16 landscape shot for Reels, TikTok and Shorts
Today, when creating content, it’s no longer enough to think only about YouTube. You also have to think about vertical formats: Reels, TikTok, Shorts, stories…
And that’s precisely where a 360 drone becomes very practical.
With the Antigravity A1 , you can capture an entire scene, then choose whether you want to export it horizontally or vertically. You’re not limited by the initial framing.
How to carry out this plan
Film a wide landscape: mountain, beach, road, waterfall, forest, volcano, house, viewpoint. During the flight, focus mainly on movement and fluidity.
Then, during editing, reframe to 9:16. You can direct the view towards the most interesting scenery, follow a subject, or create a more dynamic vertical movement.
Why it’s useful
A single flight can become multiple pieces of content.
You can publish:
- a YouTube version in 16:9;
- a Reel version in 9:16;
- a shorter Short version;
- an immersive story;
- a still image taken from the video.
For a content creator, it’s a huge time saver. You get better value from each flight and create more content without necessarily having to go back to film.
6. The “I look away while the drone moves forward” plan
This plan is one of the most interesting to show the difference between a classic drone and the Antigravity A1.
With FreeMotion mode, you can separate the direction of your gaze from the direction of flight. In other words, you can move the drone in one direction while looking elsewhere with the Vision glasses.
It’s a very peculiar feeling, because you no longer just feel like you’re piloting a camera. You feel more like you’re exploring space.
The idea of the plan
The drone moves slowly over a path, a cliff, a beach or a road. Meanwhile, you turn your head towards another element of the scenery: the ocean, a mountain, a waterfall, a walking subject or a lower area.
In the editing process, you can exploit this offbeat perspective to create a shot that is more vibrant, more natural, and more immersive.
Why this plan is different
On a conventional drone, the camera typically faces the direction you choose with the gimbal. On many FPV drones, your gaze remains tied to the flight direction. With the Antigravity A1, the experience is more flexible: you can fly in one direction and visually explore another part of the scene.
This is an excellent shot to show in a test video, as it immediately conveys the appeal of the immersive drone.
Concrete example
Imagine a sequence in Réunion: the drone moves above a hiking trail, but you turn your head towards the ocean or a cliff. The result gives a much more natural sense of exploration than a simple straight-ahead shot.
7. Sky Path to create a clean trajectory
Sky Path is a very interesting feature if you want to achieve cleaner movements without having to manually pilot each trajectory.
The idea is to create or plan a flight path, then let the drone follow that trajectory. This is perfect for achieving smooth, fluid, and more cinematic movement.
Why this is useful for beginners
When you’re starting out, what’s often most difficult isn’t just getting the drone to take off. It’s producing a clean movement: not too fast, not too abrupt, not too hesitant.
With Sky Path, you can simplify this part. You prepare your trajectory, then you focus more on the final result.
When to use Sky Path
Sky Path is ideal for filming:
- a landscape;
- a house for rent;
- a beach;
- a tourist destination;
- a road;
- a waterfall;
- a travel sequence;
- a product presentation video;
- a YouTube intro.
Creative variant
You can use the same path to create multiple angles during editing. For example, a first export facing forward, a second to the side, a third from above, and a fourth in vertical format.
This is where the 360 makes perfect sense: a single trajectory can produce multiple shots.
Summary table of the 7 video plans
| Video plan | Difficulty | Best use | Ideal format |
|---|---|---|---|
| Immersive forward tracking shot | Easy | Travel, vlog, landscape | 16:9 / 9:16 |
| Vertical ascent | Easy | Intro, Revelation, Reel | 16:9 / Shorts |
| Invisible drone | Easy | Immersive plan, transition | 16:9 |
| Deep Track | Medium | Subject in motion | Reels / YouTube |
| Landscape in 9:16 | Easy | Social networks | 9:16 |
| Looking away while flying | Medium | Immersion, product testing | YouTube / Reel |
| Sky Path | Medium | Fluid movement | 16:9 / 9:16 |
My tips for making your plans a success with the Antigravity A1
Even though the Antigravity A1 simplifies many things, a few good habits can really improve your images.
Filmed with beautiful lighting
Light remains essential. For a cleaner result, avoid overly dark scenes or times of day when the sun is too harsh. Morning and late afternoon are often the best times to film.
Make slow movements
A 360 drone offers a lot of freedom, but that’s no reason to move too fast. Slow movements are often more cinematic and easier to reframe afterward.
Think about the setup before flying
Before you take off, ask yourself what your plan will be used for. Is it a YouTube intro? A Reel? A transition? An immersive sequence? A presentation video?
This intention will help you to better choose the path.
Vary the heights
To make your edit more dynamic, vary the points of view:
- low plan;
- medium shot;
- high shot;
- wide view;
- bird’s-eye view;
- close-up shot of a subject.
Even with just one location, you can create a much richer video if you vary the heights and angles.
Don’t strive for perfection in piloting
That’s precisely one of the great advantages of a 360 drone. You don’t need to achieve the perfect framing during the flight. You can concentrate on the trajectory, the atmosphere, and safety, and then choose the best angle afterward.
For whom are these plans most useful?
These 7 video plans are especially useful if you want to create more content with less stress.
For content creators
You can film a single sequence and export it in multiple formats. This is ideal if you’re posting on YouTube, Instagram, TikTok, or Shorts.
For travelers
When traveling, you don’t always have time to do multiple flights. With a 360 drone, you capture more information in a single shot.
For beginners
You don’t need to be an expert pilot to get interesting shots. Framing can be worked on after the flight, which greatly reduces the pressure.
For videographers
The Antigravity A1 allows you to create original movements, dynamic reframing and angles that a classic drone does not always allow as easily.
Should the Antigravity A1 be chosen to create this type of content?
If your goal is simply to take some classic aerial shots, a traditional drone may suffice.
But if you want to create more immersive images, vary the angles, easily export vertically and horizontally, film yourself, crop afterwards and produce multiple pieces of content from a single flight, then the Antigravity A1 becomes much more interesting.
It’s not just a 360 drone. It’s a creative tool designed for videographers, travelers, and creators who want to save time while getting more original shots.
Right now, you can use the promo code AGRRLOV to take advantage of the offer with a free lens replacement kit + takeoff mat , subject to current conditions.
See the offer with the code AGRRLOV
Conclusion: One flight, multiple contents
The appeal of the Antigravity A1 isn’t limited to its technical specifications. What truly sets it apart is its filming method.
With a traditional drone, you often have to get your framing just right while flying. With a 360 drone, you can capture the entire scene and then choose your angle afterward. For a content creator, that’s true freedom.
The 7 plans presented in this article are easy to reproduce, even if you are a beginner:
- traveling forward;
- vertical ascent;
- invisible drone effect;
- Deep Track monitoring;
- vertical export for Reels;
- Free gaze during the flight;
- Clean trajectory with Sky Path.
With a little practice, these shots can quickly give a more professional look to your travel videos, vlogs, Reels, or YouTube content.
And that’s exactly where the Antigravity A1 makes perfect sense: it allows you to fly more freely, frame more intelligently, and create more content from a single flight.