

If you already film in 360°, you may have noticed something odd: sometimes, an object or person appears slightly “cut out” or misaligned right at the junction of the two lenses. This is called a stitching artifact . And the good news is that you can avoid it—or at least reduce it—by following a simple rule: the optimal stitching distance . In this article, we’ll look at what it is, how it works, and most importantly, how to apply it with your Insta360 X5 .
What is 360° sewing?
In 360° video, the camera uses two ultra-wide-angle fisheye lenses that capture two hemispheres. Then, the software (either in the camera or in post-production) stitches the two images together to create a complete sphere. This stitching process is called “stitching.”
The problem is that this junction between the two images is a sensitive area . And if a subject is too close to this invisible line, it risks being poorly stitched: blurry edges, distortion, misalignment… in short, a rather botched effect that we want to avoid as much as possible.
a:hover { transform: scale(1.05); } a[href*=”amazon”]:hover { background-color: #e68a00; } a[href*=”insta360″]:hover { background-color: #222222; } a[href*=”lacameraembarquee”]:hover { background-color: #0052a3; }
What is the ideal distance with the X5?
On the Insta360 X5 , the stitching area is managed quite well thanks to the improved stitching algorithm, but there is still a recommended minimum distance :
👉 1 meter between the subject and the camera.
Below this distance, you are more likely to see artifacts, especially if the subject is poorly placed (right between the two lenses).
💡 Pro tip: if you want to film something very close (e.g., an object on a table), try placing it in front of a single lens , not in the middle.
How do I know where the seam line is?
On the X5, it’s simple: imagine a straight line connecting the two lenses. This line forms the “seam zone”. Everything on this line, especially within one meter, is potentially at risk.
To help you:
- 🔄 Use the Insta360 app to see the framing in real time
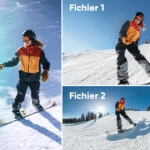
- 👀 Check out the seams in Insta360 Studio after filming (you’ll spot them quickly)
What if I want to film from less than one meter away?
It’s doable, but you have to be a little cunning:
- Position the subject directly in front of a lens , not between the two.
- Use a lower or higher camera angle to avoid direct alignment
- In post-production, you can reframe using the Reframe effect to shift the stitching point.
You can also play with the environment to hide the seam : a plant, a wall, a piece of furniture… it can do the job if placed well.
Why is it important to respect this distance?
Because even the best camera in the world can’t guess what’s in the blind spot between its two eyes. By respecting this distance rule, you win:
- ✅ A cleaner rendering, without visible artifacts
- ✅ A more natural image
- ✅ Less post-production editing required
- ✅ Better immersion for the viewer
Conclusion
Maintaining a 360° seam distance isn’t a rigid rule, but a good habit to adopt. By keeping at least one meter between your X5 and your subject (except in specific cases), you’ll directly improve the quality of your videos. And with a little practice, you’ll instinctively know how to position your camera to avoid visible seams.
So next time you film in 360°, think about sewing 😉

Leave a Reply