
The advent of 360 photos on Facebook has revolutionized the way users share and live their experiences on the platform. These immersive images enable 360-degree exploration, offering a panoramic view and unprecedented immersion in the moments captured. Whether to showcase breathtaking landscapes, share the atmosphere of events or simply offer a unique perspective on everyday moments, 360 photos greatly enrich interaction on Facebook.
The ease with which these photos can be imported and edited on iOS and Android devices is a major plus. Facebook has simplified the process, making publishing these photos accessible to everyone. Whether you’re a technology enthusiast or a casual user, sharing a 360-degree view of your world is now at your fingertips. This feature fits perfectly with Facebook’s mission to make sharing and connecting richer and more authentic. In this article, we’ll explore how to import and edit 360 photos on Facebook, underlining the platform’s commitment to offering ever more innovative and engaging user experiences.
360° Photos presentation
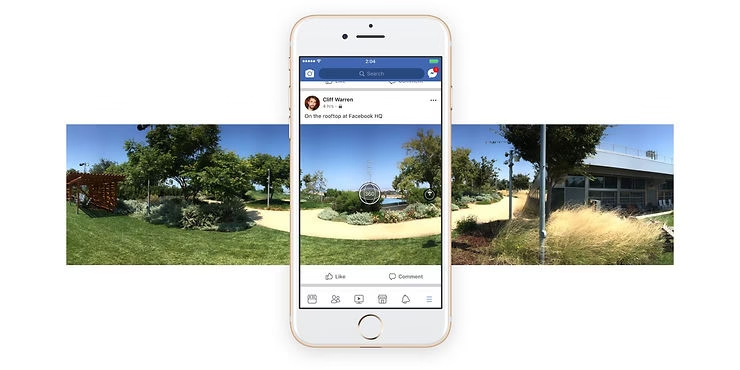
360 photos, also known as 360-degree panoramic photos, offer a complete view of the captured environment, allowing users to virtually immerse themselves in the photographed location. Unlike traditional images, which limit the perspective to a specific frame, 360° photos embrace the entire space around the point of view. They capture not only the front, but also the back, top, bottom and sides, creating a rich, immersive visual experience.
These photos are made possible by stitching together multiple images taken from different angles to form a complete sphere, or by using cameras specifically designed for this function. Viewers can interact with the photos, moving freely through the image to explore every detail, as if they were actually present at the scene. This technology has a wide range of applications, from virtual tours of real estate properties to virtual travel experiences, to sharing meaningful moments with an added dimension.
As for compatible devices, the options are varied and accessible. Many modern smartphones, equipped with dedicated apps or built-in features, can create panoramic images that, when stitched together, offer a 360-degree view. Specialized 360 cameras are also available on the market, designed specifically for this task. These cameras often incorporate multiple lenses pointing in different directions to capture the entire landscape simultaneously, simplifying the process of creating 360 photos. Leading brands include Ricoh Theta, Samsung Gear 360, and Insta360, offering options for both amateurs and professionals keen to explore this fascinating dimension of photography.
Integrating and sharing these photos on platforms such as Facebook not only keeps memories more vivid and immersive, but also offers a new dimension to visual storytelling on social networks.
How to import a 360° photo on Facebook
Importing a 360 photo to Facebook is a simple and straightforward process, allowing users to share immersively captured moments with friends and family. Here’s how to do it:
Prerequisites
Before you start, make sure you meet certain prerequisites for a smooth experience:
- Facebook app: You need to have the Facebook app installed on your iOS or Android device. This feature is not available on the web version of Facebook, so access via the app is required to import 360 photos.
Import steps
Follow these simple steps to import your 360 photo to Facebook:
- Open the Facebook application: Launch the application on your device. Make sure you’re logged in to your account.
- Press the Photo/Video option: On the home page, at the top of your News Feed or Diary, you’ll find an option to add a photo or video. Click on it.
- Select the desired 360 photo: Browse your device’s gallery to choose the 360 photo you wish to share. Once selected, the photo will appear on the screen.
- Adjust the viewing starting point: Before publishing, you can adjust the starting point of the 360° photo. This means you can choose which part of the photo will be the focus point when someone starts viewing it. Simply drag the photo to adjust this point of view to your preference.
- Choose the audience and publish: Last but not least, choose who will be able to see your 360 photo. You can make it public, limit it to your friends, or even select a specific group of people. Once you’ve chosen your audience, press “Publish” to share your immersive experience with your network.
Note: If you share a panoramic photo with an aperture greater than 100 degrees, Facebook will recognize it and automatically treat it as a 360 photo. You can also publish it as a regular photo, if you prefer.
By following these steps, you can easily share your adventures and moments captured in 360 degrees, offering a unique and immersive experience to your audience on Facebook.
Modifying a 360° photo after publication
Even after you’ve shared a 360 photo on Facebook, it’s possible to make changes to enhance the experience of those who view it. Whether you want to adjust the initial viewpoint or interact with your network via tags and comments, here’s how.
Adjusting the initial point of view
If, after publishing a 360 photo, you decide that the initial viewpoint could be improved, follow these steps:
- Access the published photo: Go to your profile or News Feed and find the 360 photo you want to edit.
- Editing options: Unfortunately, Facebook does not currently allow you to change the initial point of view directly after publishing a 360 photo. You’ll need to delete the publication and republish it with the adjusted viewpoint as described in the previous section on importing.
Tag friends or add comments
- Tag friends: To tag friends in your 360 photo, open the photo and select the “Tag photo” option, which usually appears at the bottom or next to the photo. You can then click on the photo to choose where you’d like to add a tag, and start typing the name of the friend you’d like to tag. Select the correct name from the list that appears to confirm the tag.
- Add comments: To comment on a 360 photo, simply use the comment box below the photo, as you would with any other Facebook publication. You can also mention friends in your comments by using the “@” symbol followed by their name.
Additional tips
Automatically convert a panoramic photo into a 360° photo
- Wide-field panoramic photo: If you have a panoramic photo with an angle greater than 100 degrees, Facebook will automatically treat it as a 360 photo when uploading. Make sure your photo meets this condition for automatic conversion.
Tips for optimizing the quality and impact of your 360° photos on Facebook
- High resolution: For best quality, make sure your 360 photos are taken at the highest possible resolution. This will ensure that details are preserved and the immersive experience is at its best.
- Lighting: Good lighting is crucial for 360° photos. Try to shoot at times when natural light is optimal, such as during the golden hour at sunrise or sunset.
- Stability: Use a tripod or stabilizer to avoid blurring and ensure images are sharp. This is particularly important for 360 cameras, which take multiple images to create a complete view.
- Storytelling: Think of the scene you’re capturing from every angle. 360° photos offer a unique canvas for storytelling. Position elements of interest all around you to encourage users to explore the whole scene.
By incorporating these tips into your practice, you’ll be able to create high-quality 360 photos that captivate and engage your friends and followers on Facebook.
Conclusion
Together we went through the various steps involved in importing and editing 360° photos on Facebook, an innovative feature that enriches the sharing experience on social networks. Using this technology offers a unique immersion and 360-degree perspective that captivates your audience’s attention. We urge you to explore this feature, whether you’re usingInsta360 X3 or other compatible devices, to share your moments with an added dimension.
We also invite our readers to share their experiences, tips and questions about using 360° photos on Facebook. Your feedback and tips help enrich our community and help other users get the most out of their devices and their creations.
FAQ (Frequently Asked Questions)
- Do I need a special application to import my 360° photos onto Facebook?No, you can import your 360 photos directly using the standard Facebook app for iOS or Android.
- Can I edit the point of view of my 360° photo after publication?Yes, Facebook lets you adjust the initial viewpoint of your 360 photo even after it’s been published.
- How can I make sure my photo is recognized as a 360 photo on Facebook?Make sure that the photo meets the technical specifications required by Facebook for 360 photos. Using specialized devices like Insta360 makes this process easier, thanks to their compatible format.
Additional Resources
For those who wish to delve deeper into the subject and fully master the art of 360 photography on Facebook, here are some links to video tutorials and detailed articles:
- Insta360 X3: Review and Full Test
- Insta360 Titan: The Revolution in 11K 360° Video
- Insta360 Ace & Ace Pro: Unequalled image quality
- The New Insta360 Link Update
These resources will offer you additional tips and tricks for capturing and sharing 360 photos effectively and creatively. Take advantage of these tools to take your 360 photography skills to the next level and capture memorable moments from every angle.


Leave a Reply